Recording your steps with Steps Recorder

Steps Recorder formerly Problem Steps Recorder (PSR) is a powerful and easy-to-use end-user information-gathering and system administrator troubleshooting tool. However, Steps Recorder has lost its limelight in the new generation. Mostly because it's a long-forgotten tool that is built into each distribution of Microsoft Windows. You may hear about it every now and then from seasoned and some new administrators but its use is not just for administrative troubleshooting. It can be easily adopted into quickly-made user guides for turnovers.
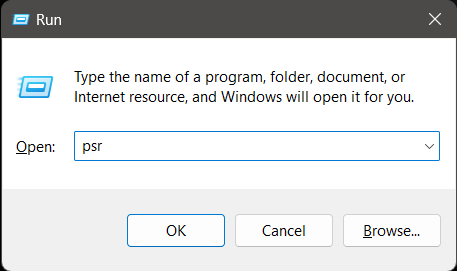
To start Steps Recorder you can either use the Windows Search feature or press 🪟+R to bring up the Run prompt and type in PSR.
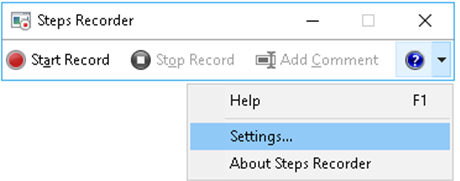
By default, Steps Recorder is configured to take 25 screenshots and prompt for save location following the completion of a recording. To change these settings click on the drop-down arrow next to the help menu and select Settings.
To enable a default save location, edit the Output Location field by using the Browse button. Navigate to the new location and select Save.
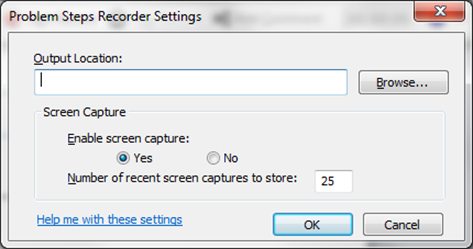
This is where you can also temporarily change the default screens to capture from 25 to a max of 999.
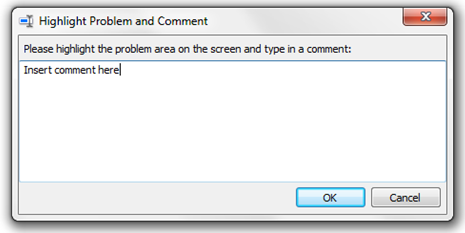
Adding a comment while recording is easily done by clicking on Add Comment (ALT+C). The screen will become opaque allowing you to select the area in which to comment using the crosshairs. Once you have highlighted the focus area you can add comments to help aid the reader.
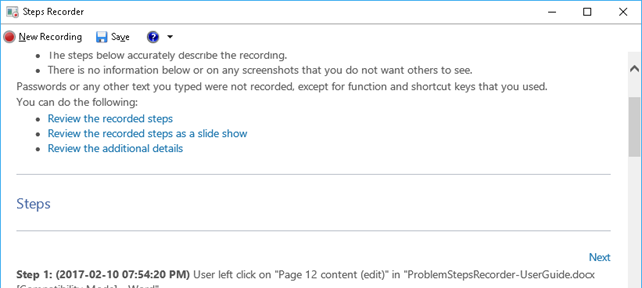
To start recording click on Start Recording and each click or mouse move Steps Recorder will mark your steps. Once you are done recording click on Stop Recording. If you need to pause during the Recording click on Pause Recording. When you are done click Stop Recording and click on Save to open the save as dialog. Browse to the location in which to save the .zip file, enter a filename and click on Save.
Steps Recorder is fairly simple to use and doesn't require any deep understanding. Next time you need to document your steps for either troubleshooting or turnover use Steps Recorder as your built-in screen capture tool. It's a lot faster and the file size is smaller than using PowerPoint or Screen Recording off PowerPoint.