Implementing Channels in TAK

Change Log
20230826 - Added iTAK
So, you want to implement channels? First, let's define channel and group usage within TAK. Honestly, they both are the same. The difference is groups are active 100% of the time they are applied. For example, if you're a member of multiple groups you participate in those groups no matter what. With channels, you can enable the groups you need at any time. If you need a refresher on groups, click here.
If you recall with the TAK Server there is a flat-file authentication method, by default is the way you manage users and groups out of the box. The other method is the lightweight directory access protocol (LDAP) or Microsoft Active Directory (ADS). Channels can be applied to both authentication methods and are controlled by the end-user or client at any time. When utilizing LDAP/ADS the group or channel being applied to the end user or client is matched against the certificate's common name or subject. It's important to note that when using external certificate authorities (CA) for issuing certificates the common name matches the LDAP/ADS authenticated username. To learn more or implement client LDAP/ADS authentication using certificates click here.
Configuring the TAK Server
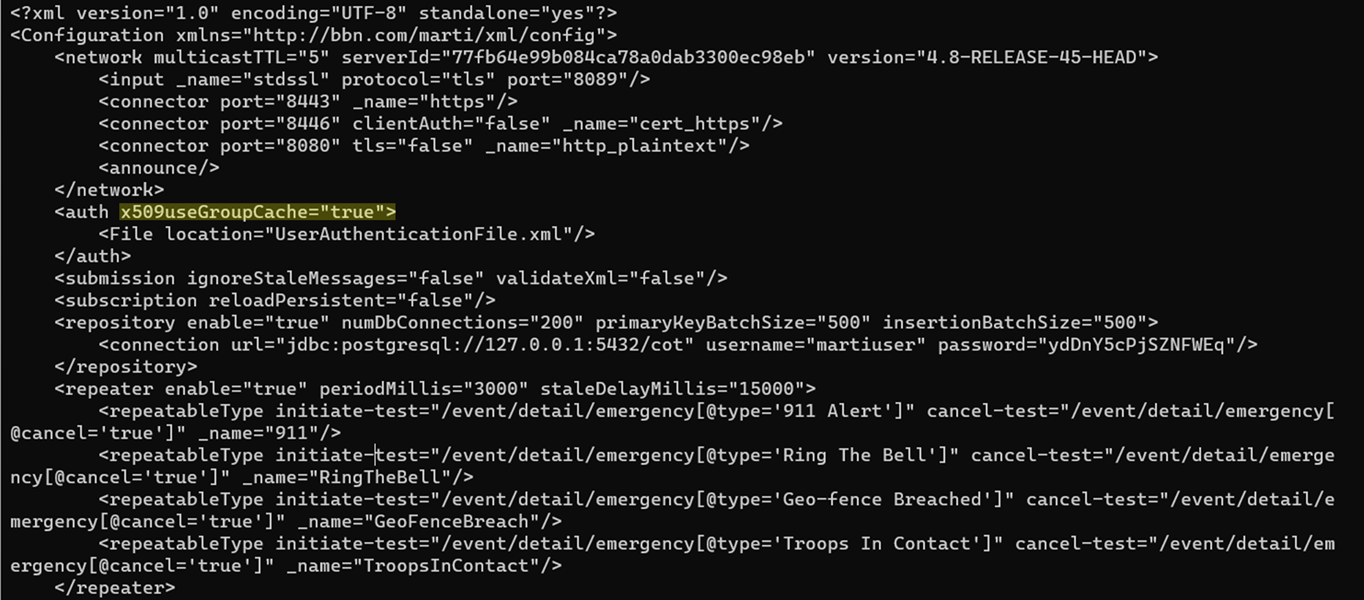
Channels are not enabled by default. First, edit our core configuration file to accept the channel configuration by adding the x509useGroupCache attribute to the auth element of the CoreConfig.xml and setting it to true. To edit the CoreConfig.xml start by accessing your TAK Server either via a remote connection or by direct access. Once authenticated to your TAK Server navigate to the /opt/tak directory. Then we need to invoke the tak user and edit the CoreConfig.xml.
# Change directory to /opt/tak
cd /opt/tak

# Change user to tak
sudo su tak

# Edit the CoreConfig.xml
vi CoreConfig.xml
Within the CoreConfig.xml navigate down to the auth element and add the x509useGroupCache attribute and set its value to true.
<auth x509useGroupCache="true">
    <File location="UserAuthenticationFile.xml"/>
</auth>
Enable Channel Support within the CoreConfig.xml
As always, after we edit the CoreConfig.xml we must restart the takserver service.
# Exit tak user
exit

# Restart the TAK Server service
sudo systemctl restart takserver
Restarting the TAK Server service
Device Profiles
To apply the Channel configuration to the end-user or client device we need to create a Device Profile. If you're not familiar with Device Profiles, these allow you to upload data packages that can apply to a device or group. An example is pushing a default map XML to clients of a specific group. For our configuration, we want to apply the Channel configuration to all our TAK clients. The drawback is this will only apply to newly connected clients unless you push the Device Profile manually to a client.
Start by downloading the channels.zip as we will require this to upload later.
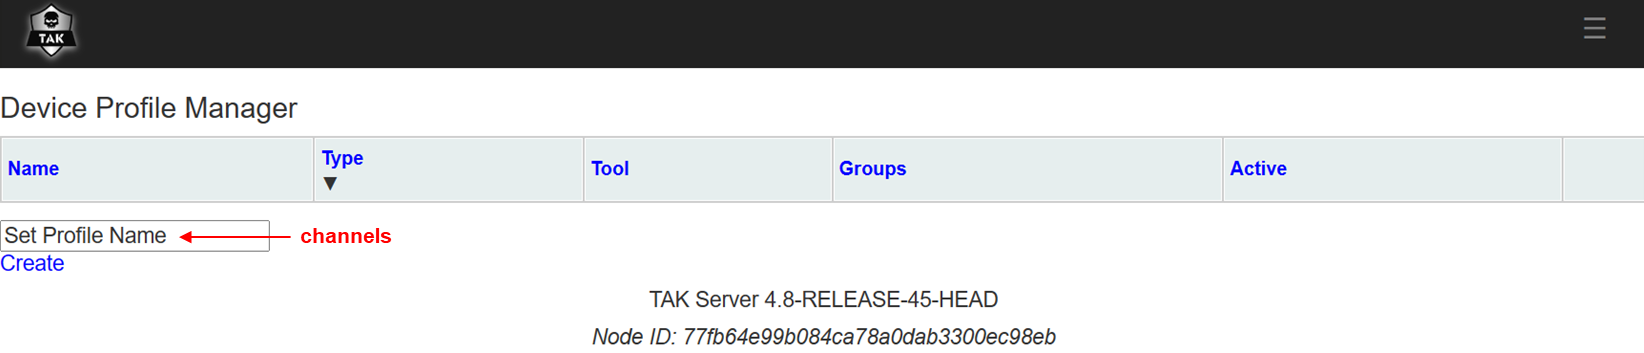
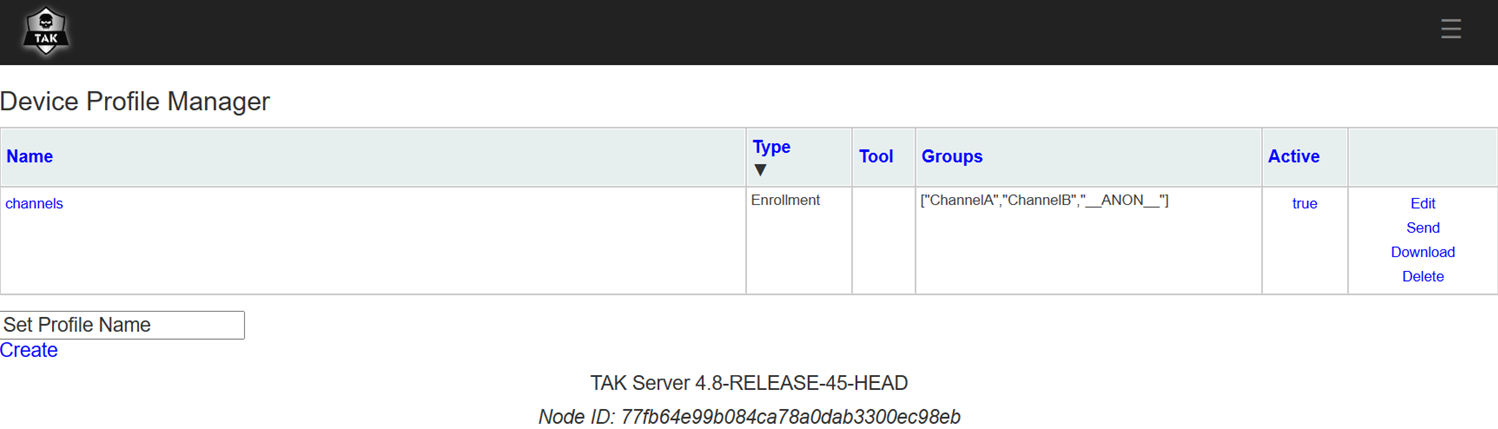
Navigate to the TAK Server web dashboard and from the hamburger menu (≡) select Administration >> Device Profiles. Within the dialog box Set Profile Name, enter a descriptive title e.g., channels. Click Create to create the Device Profile.
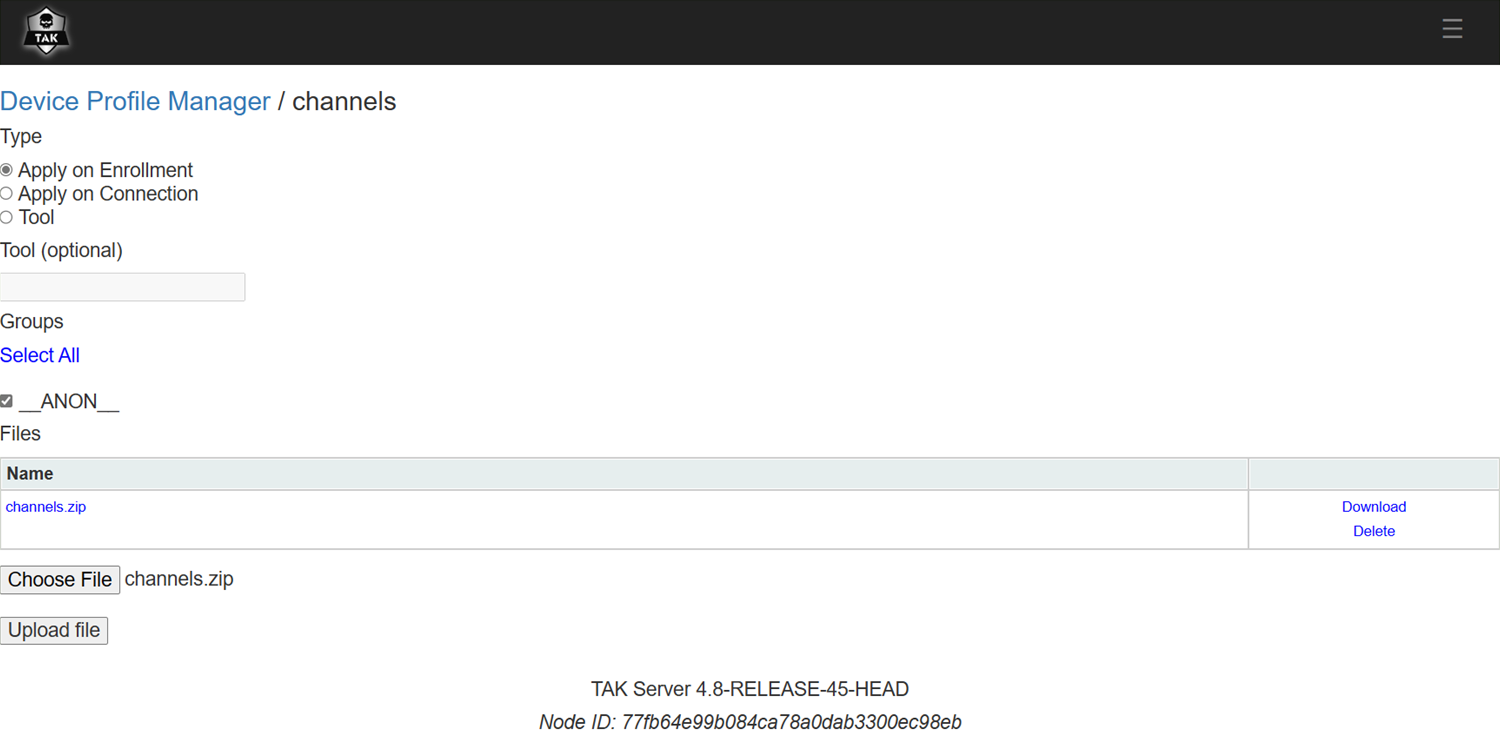
Within the new Device Profile, keep the default settings:
- Type
- Apply on Enrollment
- Groups
- Select All (Even if one group is present click on Select All, this will apply the Device Profile to newly created groups)
Under Files, click on Choose File, navigate to the channels.zip downloaded earlier, and click Upload File.
Alternatively, if you are applying this configuration on an established TAK Server you can apply this Device Profile on Connection. This will apply this Device Profile on all clients that connect and will continue to apply this Device Profile even if the client has already connected.

After the upload is successful the channels.zip will display under Files.
Now create additional groups and apply them to a user. Navigate back to Device Profiles and you should see your new groups populate under Groups. In the example below, ChannelA and ChannelB are the newly created groups applied to the channels Device Profile.
Selecting Active Channel
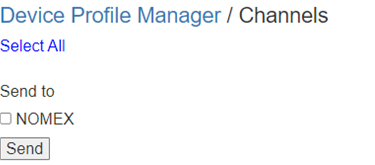
Based on the Device Profile configuration the channel configurations will be applied on enrollment or on connection. This will transfer the channels.zip via a Data Package to the TAK client and configure it appropriately. If you need to push a Device Profile to an established client, you can hit send and select the client to push the Device Profile too.
WinTAK
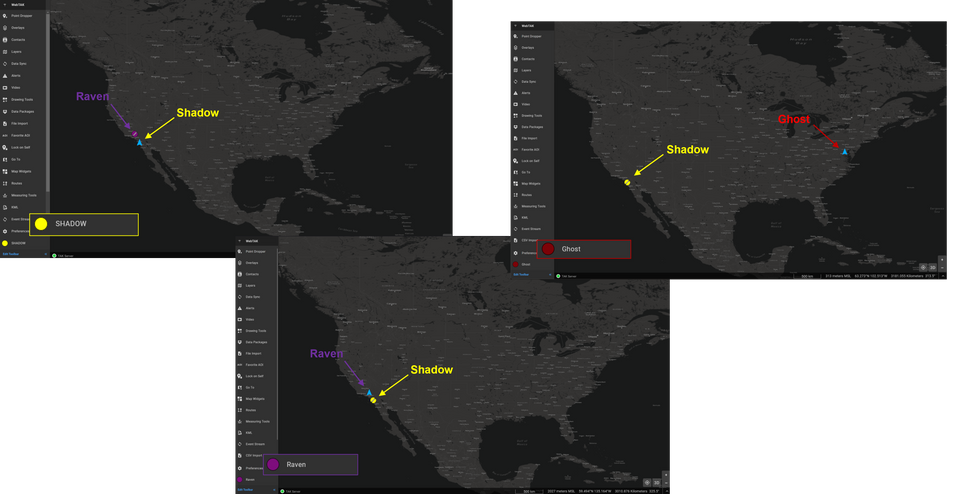
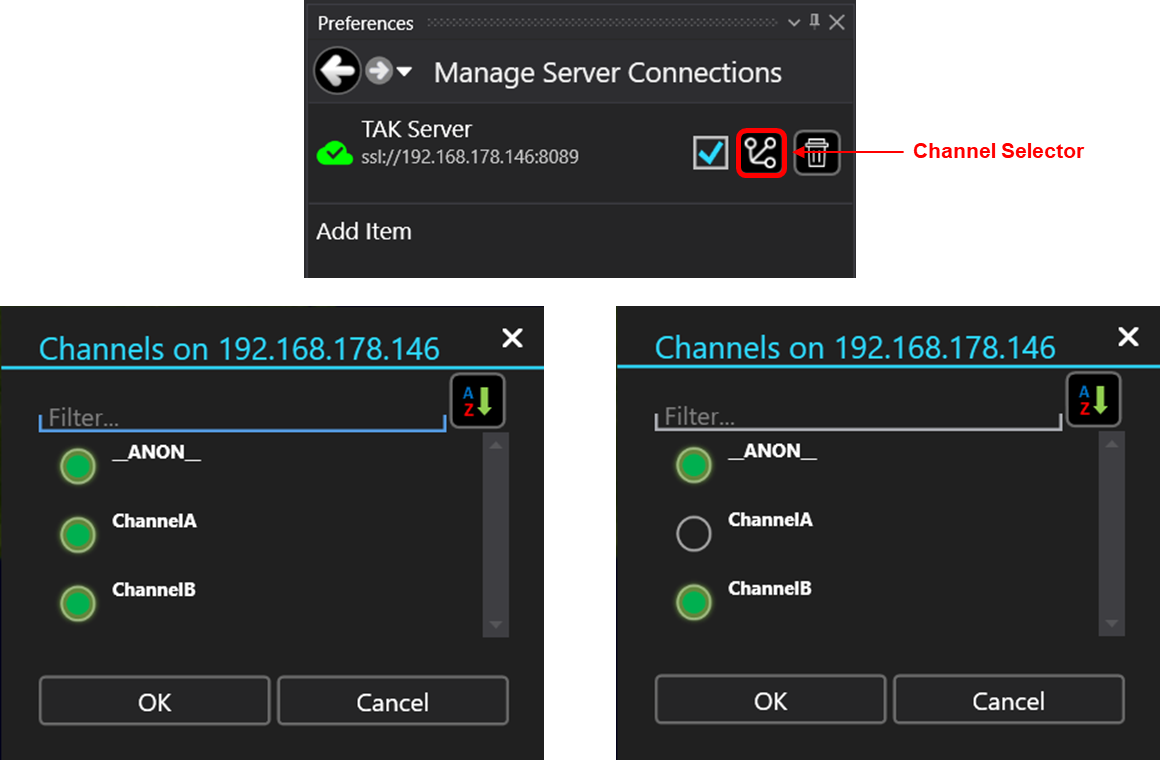
Within WinTAK that Channel selector icon is placed in the Manage Server Connections menu dock. When you click on this icon it will display which groups the client is participating in actively. This is identified by the filled-in green dot. To remove participation from a group but maintain access simply click on the green dot to toggle it on or off.
ATAK
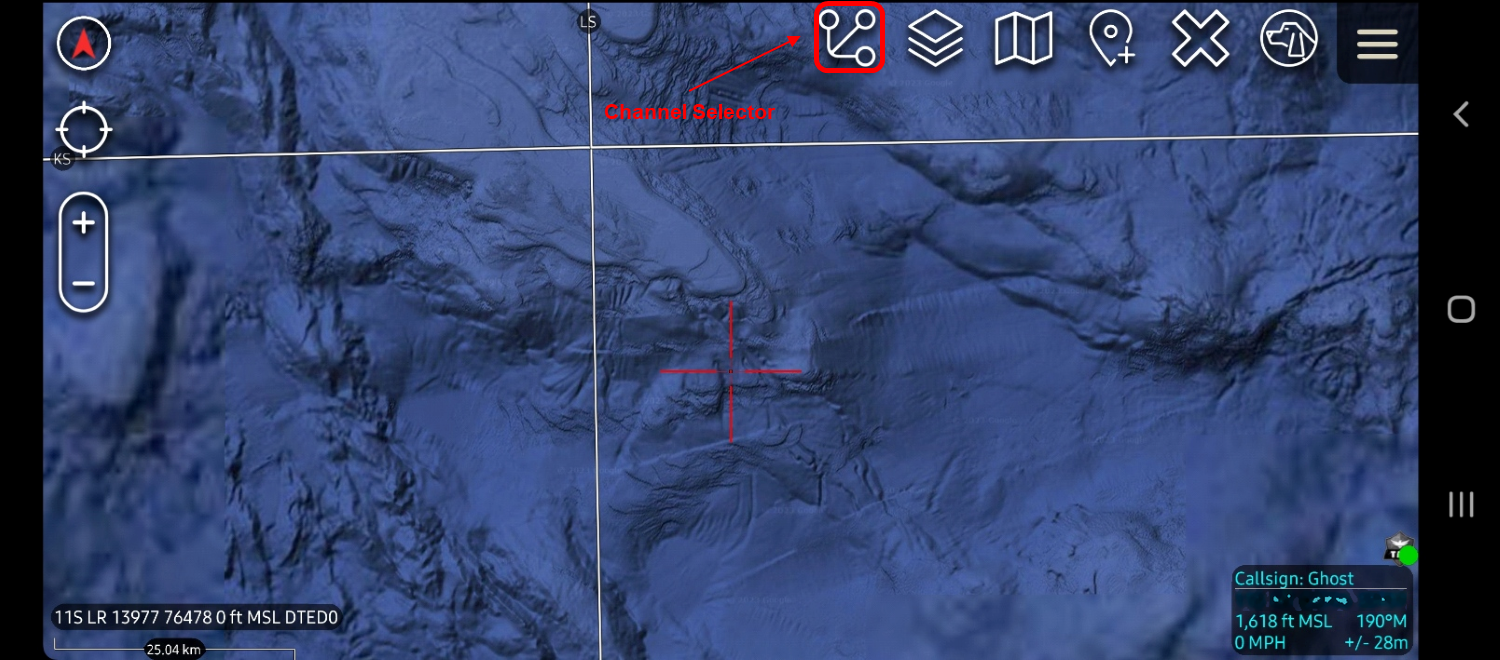
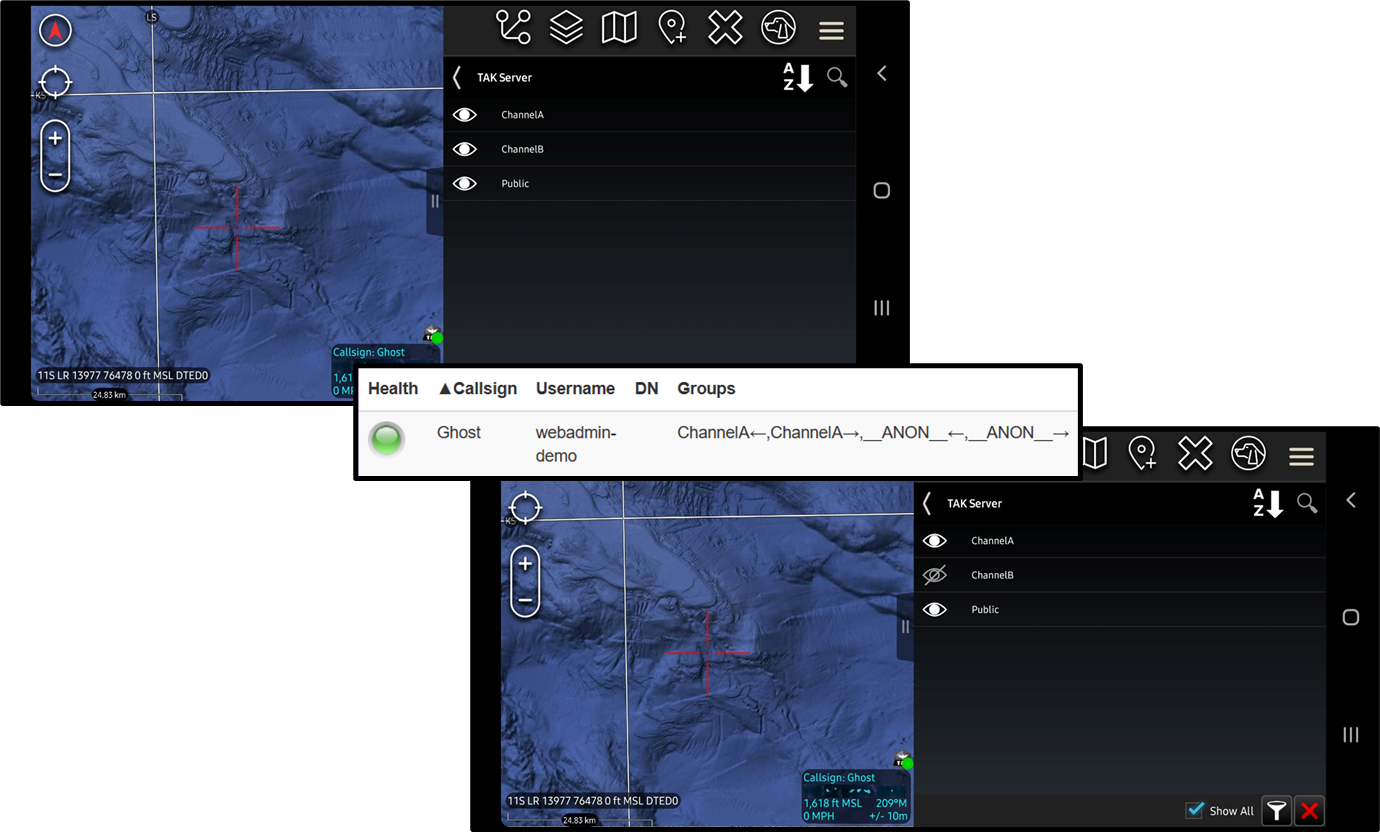
Within ATAK (version 4.7+) the Channel selector now shows up in the top menu bar. Similar to WinTAK when you click on this icon it will display the active groups that ATAK is participating in. Simply toggle the group you wish to participate on, or off which will remove access to the group but will not delete you administratively. Within the Client Monitoring Dashboard within the TAK Server, we can see that Ghost (ATAK) is participating in the ANON and ChannelA groups but is inactive in ChannelB.
iTAK
iTAK works with Channels as well, I just don't have an iPhone to test. I will update this portion when I can. Just know Channels are supported in iTAK as well.
Conclusion
Groups and Channels provide a powerful enhancement from the traditional deployment of Groups within the TAK Server. It allows the client the freedom to actively select the Group they wish to participate in without having the TAK Server Administrator move users in and out of Groups. This can be extremely helpful if you have multiple Groups applied but need to maintain access but want to turn the other Groups off.
